
How to Create a Clipping Mask in Photoshop – Clipping masks have been typically made up of several layers. A layer is placed on top of these previous layers. Cutting figures and patterns on one page and putting them on another is what a clipping mask represents. It’s as if you’re cutting out photographs and sticking those over another piece of paper. To make a clipping mask, you’ll need at least two layers. The snapshot is placed at the very end of the hierarchy.
Various layers could be included, and a file can contain multiple clipping masks. Using very few simple Photoshop functions, there is a vast limit to what you can accomplish. The clipping mask is an example of a beneficial feature. Clipping mask in Photoshop is indeed a great approach to manage the transparency of a layer.
What is The Difference Between a Layer Mask and a Clipping Mask?
When comparing a clipping mask to a layer mask, it’s helpful to think of both as the same thing. You generate a set and then add a layer mask on edge of it with the help of a layer mask. The mask is then filled with black color to cover the layer underneath or white color to let it peek through. In reality, you got layer upon layer. A bottom layer that contains your information and a top layer that contains a mask that regulates what may be seen.
Clipping masks, on the other hand, are an alternative way of regulating what can be seen in a combination of layers in Photoshop, since they use the layer underneath to evaluate what might be visible of the one above.
Layer masks function by determining what might be seen of the layer beneath based on the darkness and whiteness of the layer top, whereas clipping masks function by determining what may be seen of the layer on top based on the pixels of the layer underneath.
How to Create Clipping Mask in Photoshop – Step by Step Process
Although layer masks are ideal for blending layers with smooth changes, clipping masks in Photoshop are ideal for fitting your image into a certain shape. As we’ve seen, the pattern could be the one you have created using a selection tool. A clipping mask, on the other hand, is being utilized to cover a vector form with a picture or to insert a picture into text. Let’s take a quick look at how a clipping mask should be utilized to insert an image within a frame as to how much we can accomplish with them.
Let us just explore what methods you can use to make a clipping mask in Photoshop as now we understand the clipping mask. This is a straightforward procedure. In little time, even novices can make clipping masks like editing software experts. Let’s look more closely at the procedure. If you would like to master how to make a clipping mask in Photoshop, follow the information underneath.
Step 1: Activate the picture
To create a clipping mask, select the picture you wish to utilize. This photograph will be shown upon the Background Layer by default.

As usual, the Base Layer will be protected. Press the lock icon upon that layer name to unlock it. Following that, it might be changed to Layer 0. You may now edit this layer, and this is exactly the thing we intend to do in order to construct a clipping mask.

Step 2: Make a new layer in Photoshop
Multiple layers are required to construct a clipping mask in Photoshop. Add a fresh layer named Layer 1, when the picture is under Layer 0. The Fresh Layer symbol at the lower part of the Layer Panel can be used. Place this second layer beneath Layer 0. On the uppermost layer, place the image.

Step 3: Choose a decision
Click Layer 1 within the Layer Screen and use the assessment instruments to select a section within the picture. For it though, you can utilize most of the other choosing instruments. The length and diameter of such a clipping mask are determined by your choice. The Rectangular Marquee Instrument will be used in this case.

Step 4: Complete the selection
Minimize Layer 0’s display so that you can view your decision. We must keep the selection once it has been removed in order to use it for the clipping mask. To do so, we can use color or pattern to fill the space. Select Edit from the drop-down menu. Fill the option and afterward cover the layer using whatever color or style you like.

We’re intending to use black to cover the selection. If you uncheck it later, it can assist you to view your option accurately. This is how your chosen area will now appear.
Step 5: Deselect
You can now uncheck the layer after you have completed your desired area. Now deselect is selected from the Select Menu.

Step 6: Mask for Clipping
Returning to Layer 0, pick the layer and turn it on. Using the photograph layer as a starting point, we’ll make a clipping mask. Select from the Layer Menu, create a Clipping Mask. Layer 0 will be transformed within the layer’s clipping mask underneath it.

After you’ve completed this, you will already get a simple clipping mask in Photoshop. It doesn’t get any easier than this. At this point, the clipping mask should resemble something like it.
Throughout the background, users may add more layers. The picture for the background must be on the lower part layer.
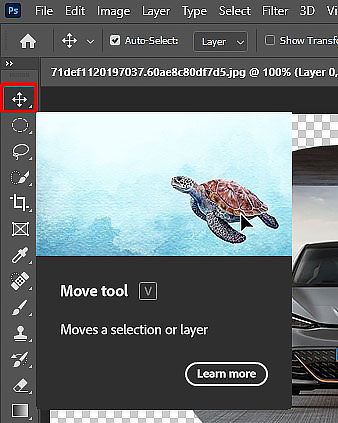
Step 7: Shifting the image
You can shift your photograph around within the clipping mask if you’re not happy with how it looks. Alter the direction of the photograph within the mask using the Move Tool while Layer 0 is chosen.
Clipping masks might be utilized for a number of purposes. Continue to experiment and practice!
FAQs
What is a clipping mask and how does it work?
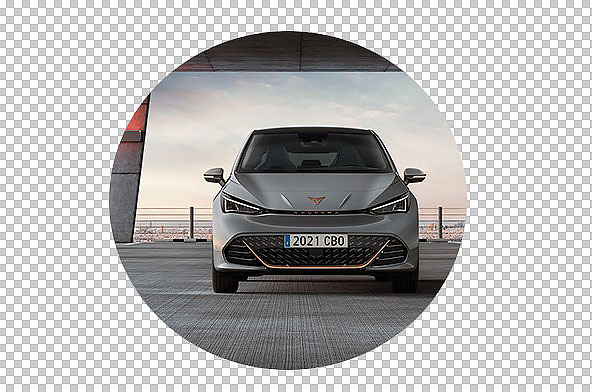
Clipping masks enable you to imply pixels via a picture only in which there are pixels in an underneath layer. For reference, you can design a circular ball inside one layer and cover it inside of it with color to create a concrete object, then upload a picture over the surface in a different layer and add a clipping mask ensuring that the picture simply appears inside that circle.
Clipping masks are utilized for what?
They are frequently utilized in graphic design to create layouts, as well as in photography to create picture composites. You can apply a clipping mask to add a texture to writing or to place a photograph in a picture frame.
In Adobe Photoshop, what is the clipping mask shortcut key?
To make a clipping mask, use Command + Option + G (macOS) or Control + Alt + G (Windows) (Windows). However, your cursor between the two upper layers in the Layers panel while holding down Option (macOS) or Alt (Windows). To attach the mask, click whenever a downward arrow displays.
Conclusion
Understanding Photoshop’s clipping masks may help you create composites of your photographs, like creating a snapshot that resembles as if it were in a photo frame or boosting some writing by bursting into flames. Clipping masks in Photoshop can also allow you to control your photograph modifications by enabling you to fine-tune alterations and focus on certain areas. Mastering clipping masks is a useful asset to your armory of Photoshop image editing skills once you get your head around how they operate, and you might find yourself utilizing them much more than you think.
How to Create a Clipping Mask in Photoshop
Published by
Clipping Path House – CPH Graphics Media
You may read CPH author’s another some famous post
How to change a photo into a pencil line drawing in Photoshop?

Pencil line drawing in Photoshop


