Photoshop Image Editing Services – Photoshop Face Swap & Blend Technique in Easy Steps – Ever wanted to switch someone’s face in a photo—maybe even replace it with a smiley, a celebrity, or a client’s preferred look? With Adobe Photoshop, that dream is easier than ever. Whether you’re enhancing product shots for e-commerce or just having fun, learning how to swap and blend faces in Photoshop is an essential skill.
In this step-by-step guide, we’ll walk you through a simple yet professional technique using basic tools and Photoshop’s Auto-Blend Layers feature.
🔁 How to Swap and Blend Faces in Photoshop
Follow these easy steps to impress friends, clients, or your portfolio!
✅ Step 1: Open Your Images in Photoshop
- Go to File > Open
- Select the images you want to use (hold Ctrl/Cmd to choose multiple)
📂 Example: 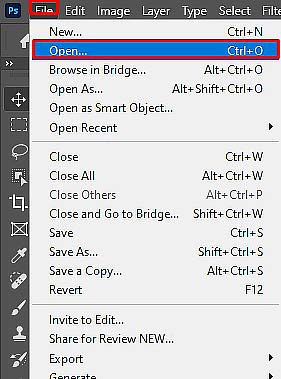
✅ Step 2: Select the Face with the Lasso Tool
- Choose the image with the face you want to use
- Press L or select the Lasso Tool from the toolbar
- Carefully draw around the main facial features: eyebrows, eyes, nose, and mouth
💡 Tip: The more precise your selection, the more natural the result.
📂 Example: 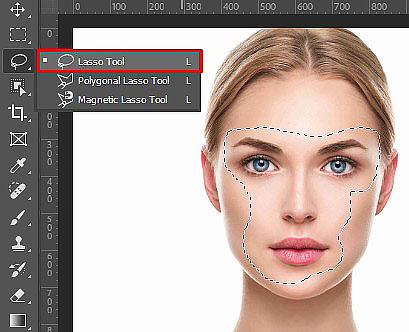
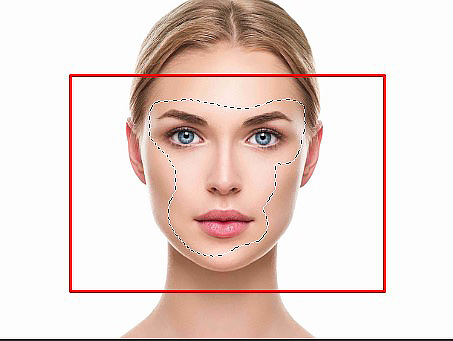
✅ Step 3: Copy the Face
- Press Ctrl + C (or Cmd + C) to copy the selected area
- Ensure the “marching ants” selection is still active
✅ Step 4: Paste the Face into the Target Image
- Switch to the destination photo
- Press Ctrl + V to paste the face
- Press Ctrl + D to deselect
📂 Example: 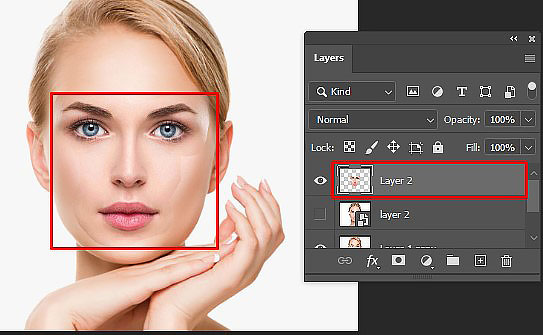
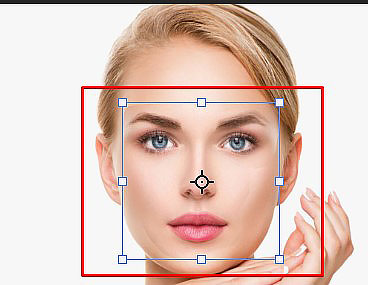
✅ Step 5: Resize & Position the Face
- Reduce the face layer’s Opacity to around 30%
- Press Ctrl + T (Free Transform) to resize and align the face
- Match the eyes, nose, and mouth with the original face
🌀 Hold Shift to keep proportions; rotate if needed.
- Hit Enter to confirm the transformation
- Restore Opacity to 100%
📂 Example: 
✅ Step 6: Duplicate the Background Layer
- Right-click the background layer → Duplicate Layer or press Ctrl + J
- Rename it “Body”
- Hide the original background by clicking the eye icon
📂 Example: 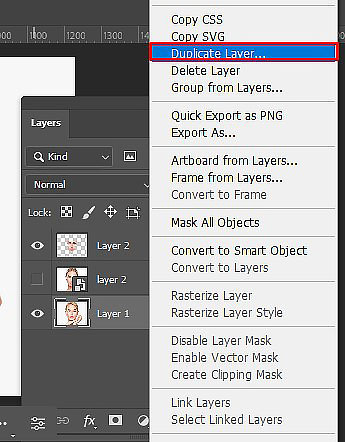
✅ Step 7: Create a Clipping Mask from the Face
- Hold Ctrl (or Cmd) and click on the face layer thumbnail to reselect it
- Hide the face layer
- The face shape will still be selected on the Body layer
📂 Example: 
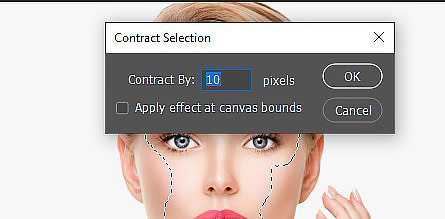
✅ Step 8: Contract the Selection Slightly
- Go to Select > Modify > Contract
- Set the value to 10 pixels, then click OK
🎯 This step ensures the face overlaps slightly, creating a cleaner blend.
📂 Example: 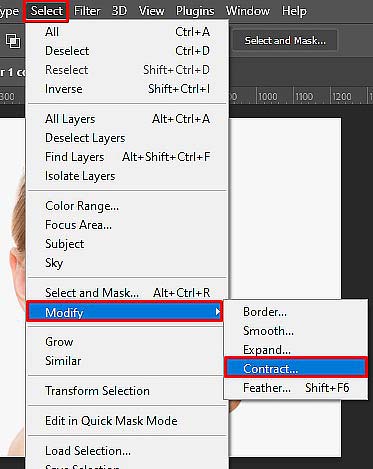
✅ Step 9: Delete Face Area from the Body Layer
- Make sure the Body layer is active
- Press Delete (or Backspace) to remove the selected face area
- Press Ctrl + D to deselect
📂 Example: 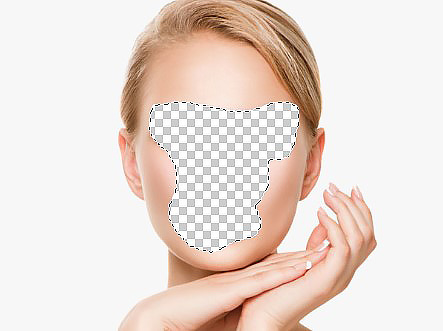
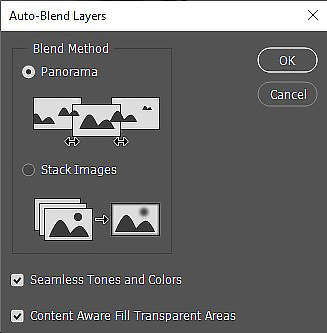
✅ Step 10: Auto-Blend the Two Layers
- Select both Face and Body layers (hold Ctrl/Cmd and click both)
- Go to Edit > Auto-Blend Layers
- Choose:
- Panorama
- Seamless Tones and Colors
- Content Aware Fill Transparent Areas
- Click OK
📂 Example: 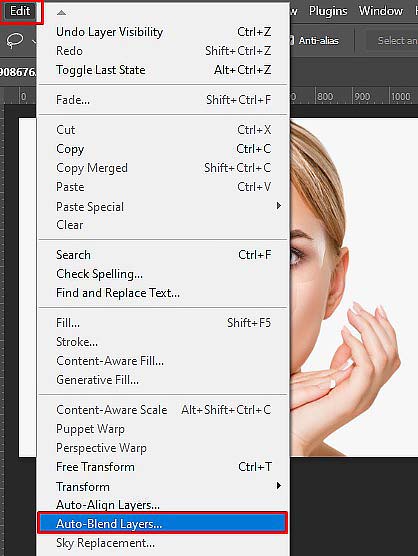
🎉 Final Result: Face Swap Complete!
Your face swap should now look seamless and natural—with color tones, lighting, and edges all beautifully blended.
📂 Example: 

✨ Final Thoughts
Face swapping in Photoshop is not just fun—it’s an incredibly useful skill in digital marketing, photo editing, and even professional product photography. With practice, you’ll be creating flawless edits in no time.
Whether you’re tweaking head-shots or crafting visual content, mastering this technique will take your Photoshop game to the next level!
Photoshop Image Editing Services – Photoshop Face Swap & Blend Technique in Easy Steps
Published by
Clipping Path House – CPH Graphics Media
You may read CPH author’s another some famous post
Top 5 Phone Cameras that Can Replace Your DSLR (2025 Update)
Top 5 Phone Cameras that Can Replace Your DSLR 2025 Update


